How to use Google Forms for appointment scheduling
Managing appointments can be a hassle, especially when it involves an endless email chain to find the perfect time slot. Luckily, there’s a stress-free solution that saves you time and makes scheduling a breeze.

Google Forms lets clients or customers pick a time slot that works for them, without having to send multiple emails. Use Google Forms for all your scheduling needs, keeping everyone informed and avoiding communication confusion. Plus, most people are familiar with using Google Forms, making it an easy and accessible tool.
In this article, we will guide you through creating scheduling forms using Google Forms and its alternatives.
The positive impact of online appointment forms on your business
Creating online appointment booking forms comes with multiple benefits for your business and workflows. Here are some of the benefits of using a scheduling system. By implementing a robust scheduling solution like Formaloo, you can streamline your operations, enhance customer satisfaction, and ultimately drive growth for your business.
- Increase employee productivity: By using online scheduling forms, businesses can automate appointment confirmation, reminders, and updates, effectively reducing the administrative workload. This helps staff focus on important tasks. It also makes sure clients get timely and correct information about their appointments.
- Make it easier for customers to book appointments online. Scheduling forms let clients book anytime, day or night. This works for different schedules and time zones.
- Boost conversions & revenues: Digital scheduling forms reduce errors and improve organization. Predefined fields make it easier to collect precise information, and the system automatically organizes the data for efficient appointment management.
While Google Forms is a start, Formaloo offers advanced features like custom branding, integrated calendars, and automated follow-ups. Sign up at Formaloo for free and see the difference!
How to use Google Forms for Scheduling
Need a simple way to manage your appointments? Google Forms can be a surprisingly effective tool for scheduling. By making a custom form, you can easily gather information from potential clients or customers. This will help simplify your appointment booking process.
With Google Forms, you can:
- Gather essential details: Collect names, contact information, preferred dates and times, and any other relevant data.
- Automate scheduling: Set up automated email notifications to confirm appointments and provide reminders.
- Easily manage appointments: View and edit your appointment schedule directly from your Google Forms responses.
Let's dive into the steps to create your own appointment scheduling form using Google Forms.
Step1: Create a Google Form
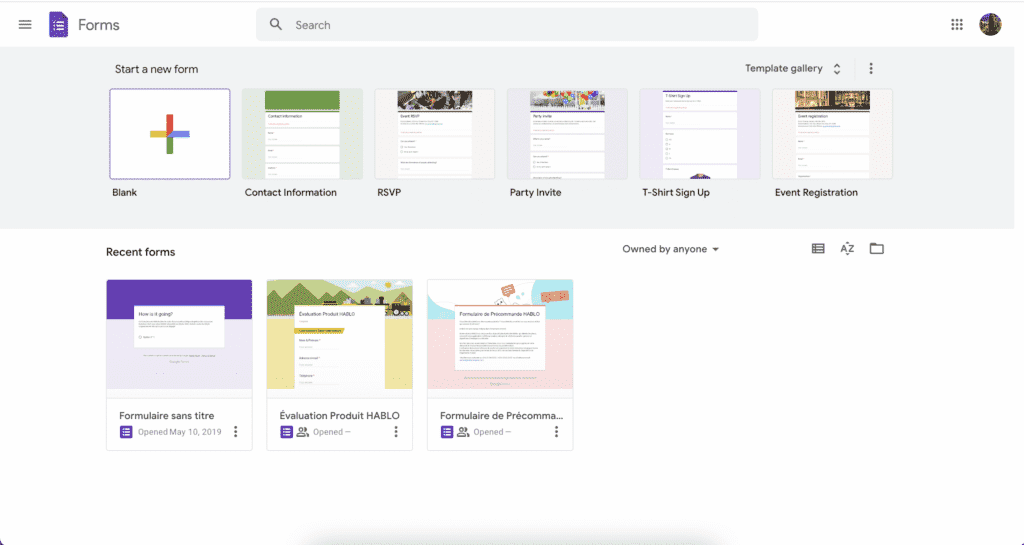
First, go to the Google Forms homepage and log in using your Google account. If you do not have a Google account, you should create one.
You can also open a new Google Form using your Google Drive.
Once at Google Forms, open a blank form from scratch by clicking the “Start a new form” button.

Step2: Set up your online appointment scheduling Google form
Name your form at the top and add a brief description if necessary. Make your form’s title clear so users know what they will sign up for.
Step3: Add your form’s fields
You should ask for the person’s name, email, and phone number. You can also require these fields to ensure you get all the information.
To add a field, click the “+ Add question” button, type in your question, and choose the right type of answer from the dropdown.
You can now set up some appointment slots. Ask a multiple-choice question like, “Choose your preferred time,” and provide all the available time options as answers. You’re all set to start collecting information and scheduling appointments.

Step4: Use conditional logic
Start your form by asking people which day of the week they want to meet. Then, based on their answer, give them different options for the time slots they can choose from using conditional logic.
Step5: Set up your scheduling form settings
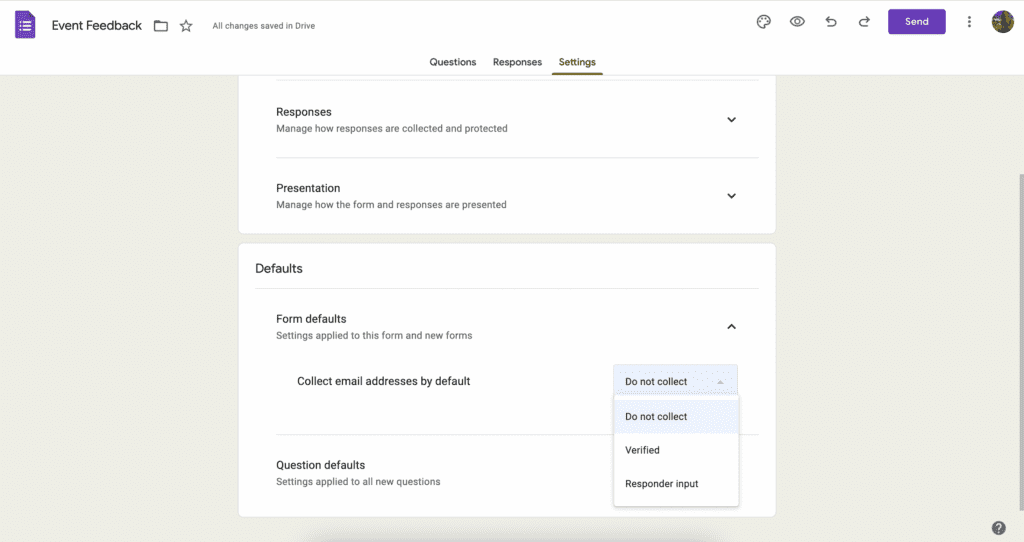
To configure settings, go to the “Settings” tab at the top navigation bar. Under the “Responses” option, enable the “Collect email addresses” option because you will need them for further communication.
You can also enable the “Limit to 1 response” option. Under the “Presentation” option you can edit the “Confirmation” message or shuffle the questions’ order.

Step6: Send out your booking request form
After setting up your Google Forms for appointments, you can send it out to people. Before sending it, preview the form by clicking on the “eye icon“.
Once you are satisfied, click on the “Send” button and share it via email, link, or embed HTML.
Is there a better way tho?
While Google Forms is simple and practical for scheduling, it has its limitations. The simple and casual design is better for class projects, internal polls, or surveys instead of professional use.
With Formaloo, you can customize your form to match your brand. This helps create a better experience for users. Choose a scheduling template, add your logo, colors, and backgrounds, and start gathering the data collected from your users.
You can let users pick their preferred date and time slots. You can also customize your form's domain and email alerts to make it look more professional. You can easily connect with Google Calendar, Google docs or even sync your form submissions with Google Sheets. This helps you manage all your appointments and transactions efficiently.
Learn more about creating an appointment scheduling form with enhanced form submissions.
Creating an Online Clinic Appointment Scheduling Form
For healthcare professionals looking to streamline their patient scheduling process, creating an online clinic appointment form is essential. A well-designed form can reduce no-shows, improve patient satisfaction, and optimize your clinic's workflow. How to create your online clinic appointment scheduling form offers a step-by-step guide to setting up an efficient, user-friendly scheduling system tailored for medical practices. Learn how to customize your form with specific time slots, collect necessary patient information, and integrate it seamlessly with your existing systems for a smoother booking experience.
Simplified appointment scheduling: The easy way to win customers
Google Forms and similar tools like Formaloo make it easy and simple for your customers. When they see that arranging a meeting with you is just a few clicks away, it becomes incredibly convenient for them.
This makes them more likely to agree to the appointment. Being efficient and respectful of time makes your business look good. This can lead to loyal customers who recommend your services.
Using a personalized appointment form makes scheduling simple and demonstrates professionalism and customer appreciation.
This can leave a positive impression on potential customers right from the start. Not only is it about convenience; it’s a clever way to get new customers and retain existing ones.
Using an appointment form is not just for scheduling. It helps attract and retain customers, leading to business growth and success.
Sign up for free and follow us on our YouTube channel for more tips and tricks.
.png)


