How to create custom email notifications
The ability to get emails for each new form submission is known as email notifications. Formaloo’s autoresponder helps you automate your workflow by sending an automatic response email to your form respondents.
.png)

When you create a new form and enable the email notification, the form will automatically send an email notification. These emails will be basic templates that will automatically update based on adding or removing fields from your form.
Learn more about How to use your Gmail SMTP server to send emails.
By setting up custom notification emails, you can customize email messages and email styles for notifications.
Let’s start to see how it works!
How to create and edit the email template
Formaloo already has email templates set up, and now you want to change the look of your emails. So, follow the steps below:
Step 1- Edit the email templates
Open your dashboard and click on your profile, then go to the "App store."
From the App store, choose the "Email" app and then click on "+ Add New Template " button. That will open the default email template that you can now customize.
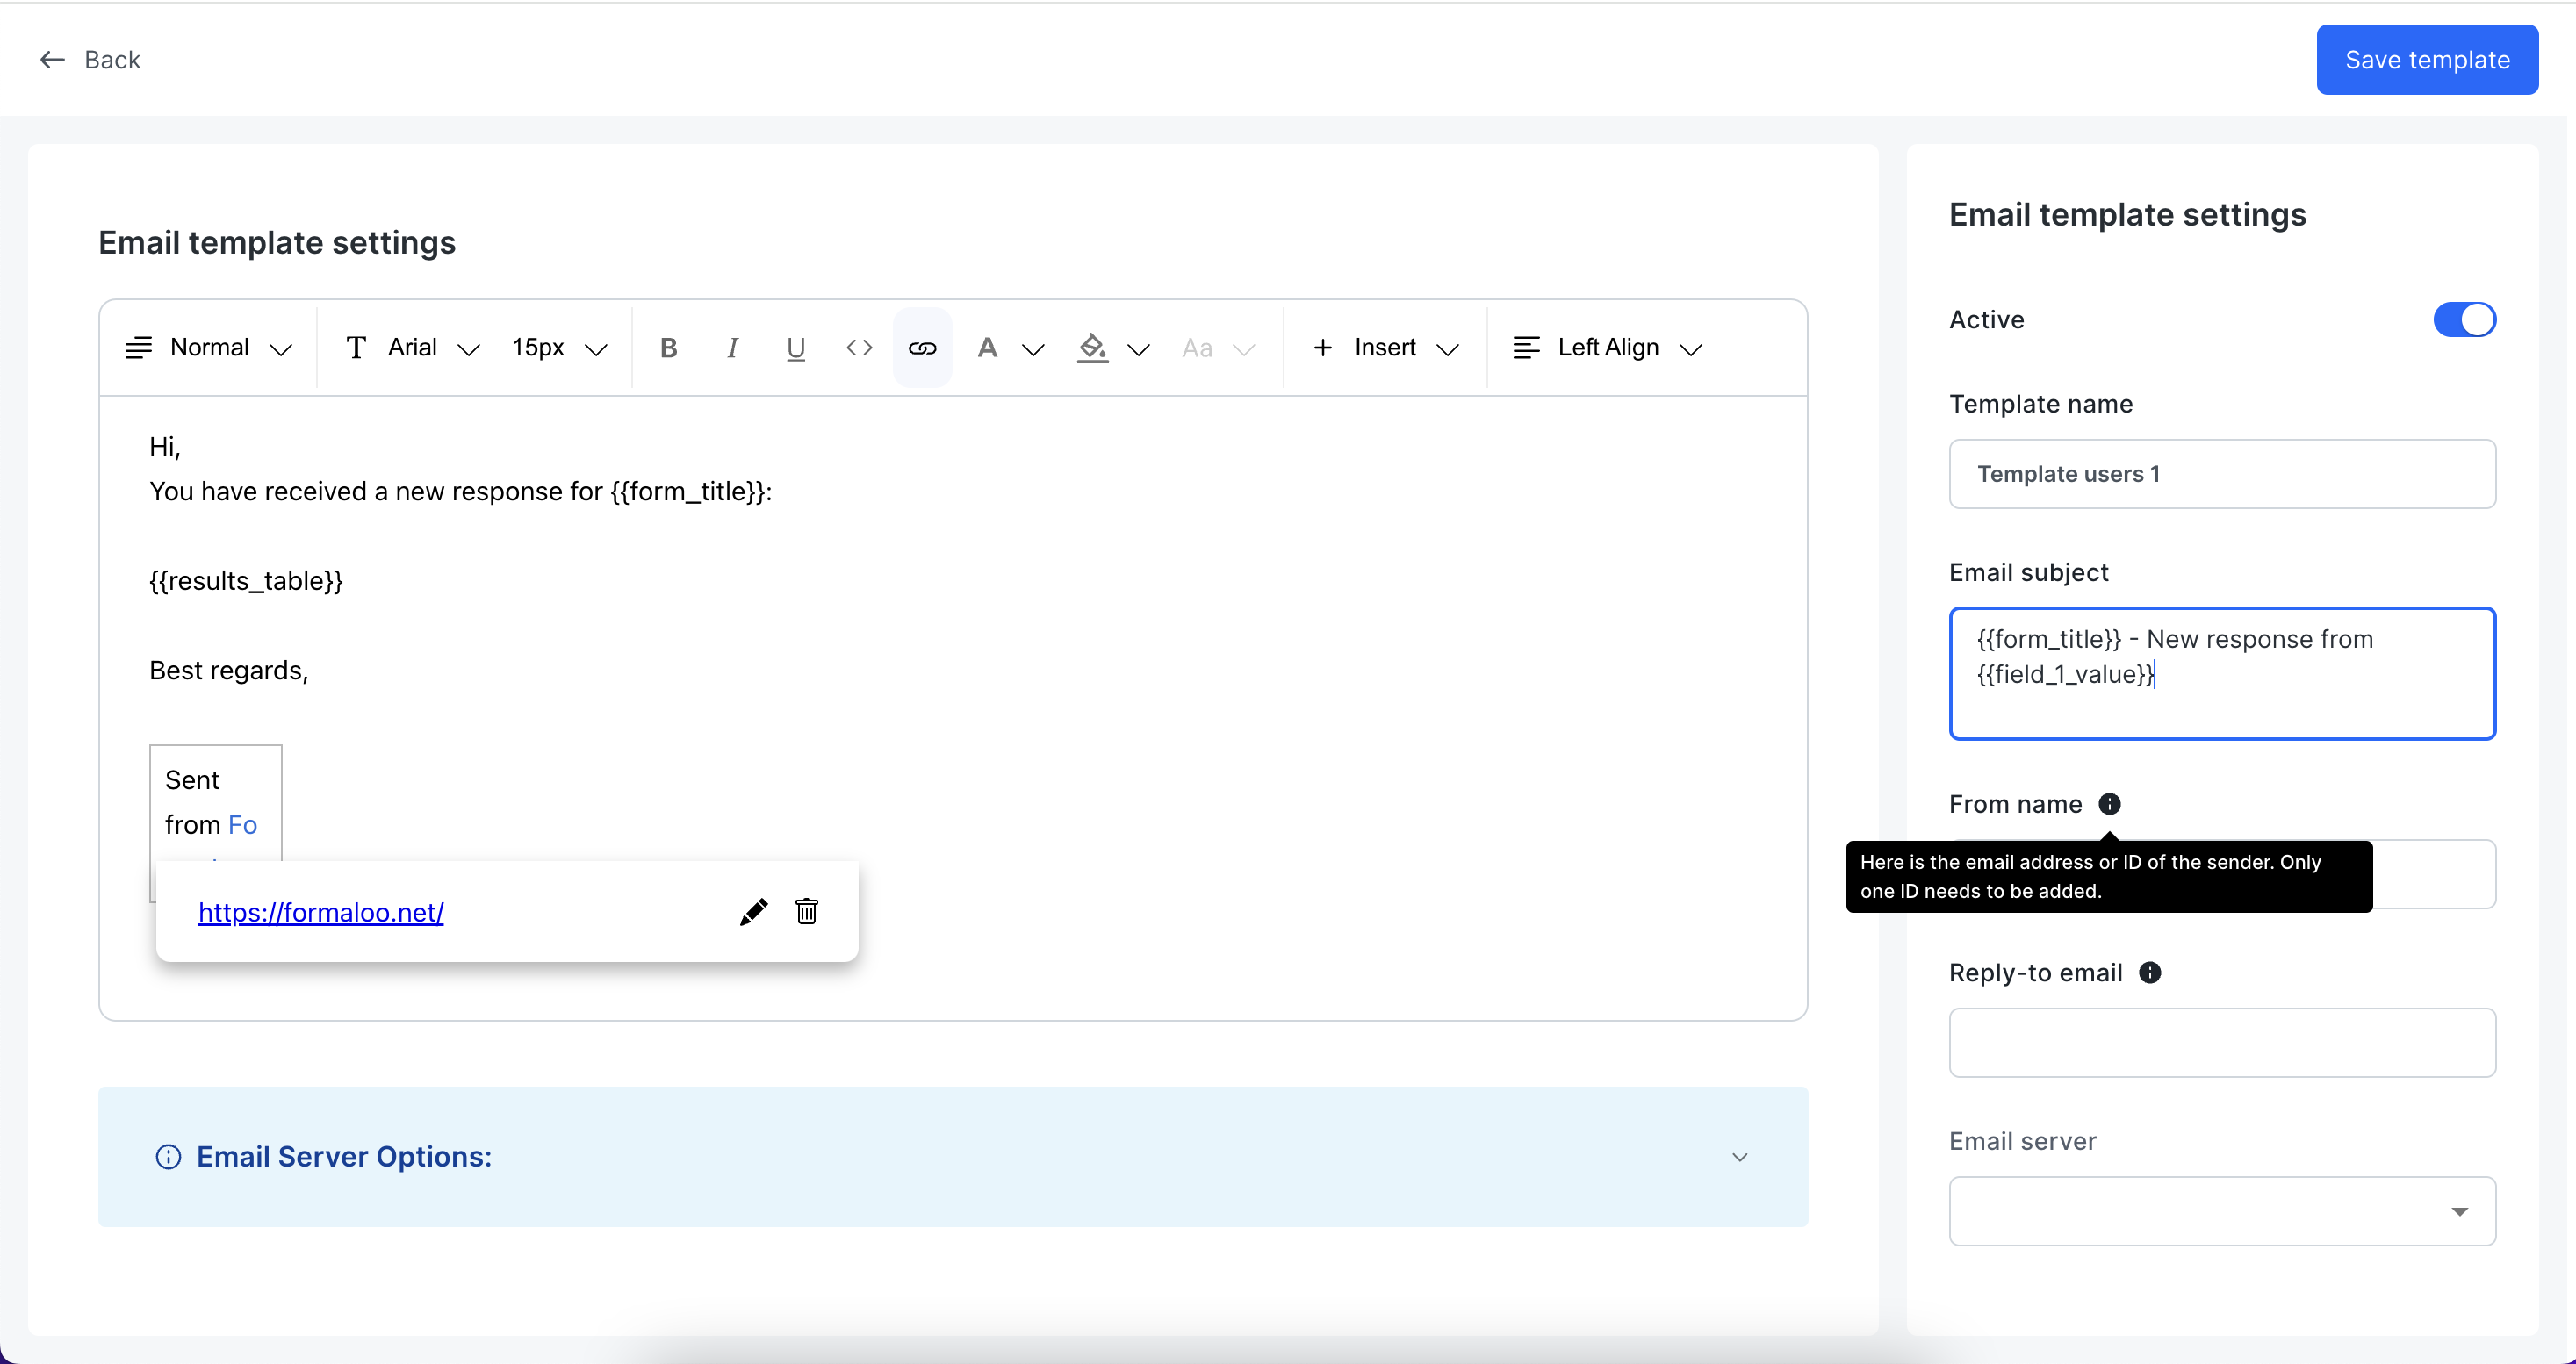
The email template includes the following:
- Template Name: This would make it easier to assign email templates to forms.
- Email Subject: Where you can write the subject of your email.
- From name: Who is the form submitter. It can be the value of the name field on your form.
- Reply-to email: Here is the email or the ID of the sender.
- Email content: Use this part to add images, links, change the font style, size, etc.
Step 2- Set your SMTP and your custom sender address
Delivering emails that feature your branding may be appropriate in specific cases. Add a unique sender email address if you want to do this.
Your SMTP (Simple Mail Transfer Protocol) connections are all that are required to make it happen.
Follow the steps below to add a custom sender email:
- Click on your profile and go to the App store.
- In the "Email" app, click on the "SMTP setting".
- Add the details of your SMTP settings.
Learn more about how to use your Gmail SMTP server to send emails.
Step 3- Customize email notifications using variables
Now it’s time to customize your template. You can make a new email template, choose a name for it, a subject, and then edit the body of your email as desired.
Using custom variables in your forms will allow you to add more personalization. The email body, subject, and sender information (name and email) can all use these variables.
Variables can be basic text (for example, form title), URLs (form logo, form address), or generated data (results table).
In general, the variables contain a variety of data, ranging from data connected to the form to data provided by the user or generated based on that data.
Following is a list of variables that are currently available:
Form Variables
These are variables related to the form's setup and configuration, useful for dynamically populating fields in email templates, reports, or other output formats.
form_title: Displays the title of the form.- Usage: In emails or confirmation pages to show the form's name.
form_description: Displays the form’s description.- Usage: For emails or embedding in reports, particularly useful if it's styled with WYSIWYG.
form_success_message: Displays the form's success message.- Usage: To include the same success message in confirmation emails or on-screen messages.
form_currency: Displays the currency code (ISO) for the form.- Usage: Relevant in payment forms for ensuring the right currency (e.g., USD or EUR).
form_full_address: Provides the URL to the form’s public display page.- Usage: Can be embedded in emails or shared for accessing the form.
form_logo: URL to the form’s logo.- Usage: Embedding the form’s logo in an email or report header.
Submitted Data Variables
These refer to the actual submitted data once a form is filled out and sent. They contain field-specific data, submitted results, and metadata like submission time.
Fields
field_i_title: The title of the field based on its position in the form (e.g.,field_2_titlefor the second field).- Usage: To dynamically display field labels in responses or reports.
field_i_value: The submitted value for a field based on its position.- Usage: To show the user’s responses to the form fields.
field_i_url: For file fields, this contains a link to the file.- Usage: To include download links for file uploads.
alias_title,alias_value,alias_url: These variables use field aliases for titles, values, and file links (if applicable).- Usage: If fields have custom aliases like
first_name, this makes it easier to refer to them in emails or reports.
- Usage: If fields have custom aliases like
Calculations
currency: The currency used in calculation results.- Usage: Payment or pricing-related forms.
Order Data
order_status: Status of the order (for forms with payments).- Usage: Useful in e-commerce forms to indicate payment progress.
order_code: A code related to the payment order.- Usage: For tracking payments or generating receipts.
payment_amount: The total amount paid via the form.- Usage: In payment confirmation emails or invoices.
Basic Data
created_at: Timestamp of when the form submission was created.- Usage: Shows when the form was submitted, often in confirmation or tracking emails.
submitter_referer_address: The address from which the form was submitted.- Usage: For logging or analytics purposes.
email_verification_state: Status of the email verification (if applicable).- Usage: In systems that need email verification for form submission.
tracking_code: A unique tracking code for the form.- Usage: For providing a tracking mechanism for submissions.
submit_time: How long it took the user to submit the form (in minutes).- Usage: Can be included in analytics or user feedback.
response_admin_address: A URL to the form submission's admin page.- Usage: Links for admins to review submissions.
Advanced
user_email: Submitter’s email address.- Usage: In confirmation or follow-up emails.
results_table: A pre-rendered table of all fields and submitted data.- Usage: To include a full summary of the form responses, such as in an email.
These variables are likely designed to be used in emails, reports, or analytics that relate to the form submission process. They allow automation and customization when managing form submissions or interacting with respondents.
Email Subject, Sender Name, Sender Email
While using the variables for these fields, please note that only simple variables are usable for these fields.
For example, you can’t use the results_table for any of these fields.
For the sender email, you can only use either a pre-defined email value (e.g. [[email protected]](/cdn-cgi/l/email-protection) ) or any variable that will return either a valid email or an empty value. If you use any other value on this field (e.g. a variable that may return a text like John Doe), your emails will not be sent successfully. It’s highly recommended to either use a predefined value, or the user_email variable, as it will be safe to use.
For the subject and sender name fields, an important note is to be cautious of the variable’s length as well. Since they’re limitations for their length while sending an email, we will automatically trim any texts longer than the standard length.
Step 4- Assign custom email templates to your form
You can choose which email template to use for alerting submitters by customizing each of your email templates and setting it in the Settings tab > Notify.
You can also select "Add a new template" straight from there.
You can also select which email template will be used to alert you and your team members.
And that’s it! You have created a customized email template in just a few clicks!
Email notification and autoresponder settings
By enabling email notifications, notifications will automatically email you or your selected recipients when someone submits your form.
Formaloo automatically creates an email notification for your account’s email address once you add the email notification. But you can edit it or create e new template and customize it.
Start creating your form from scratch or select from our 200+ templates.
Sign up for Formaloo for free. Start exploring the features it offers. These range from simple contact forms to complex and logical quizzes and surveys.
Follow us on our Youtube channel to get tutorials and live product demos.
If you have any questions, check out Formaloo’s support page to find ways you can contact us.