How to add login and signup to your no-code custom portal in 5 steps
Learn how to easily add login and signup functionality to your no-code custom portal in just 5 steps. Secure your client portal, manage user roles, and offer personalized access with Formaloo's simple setup.
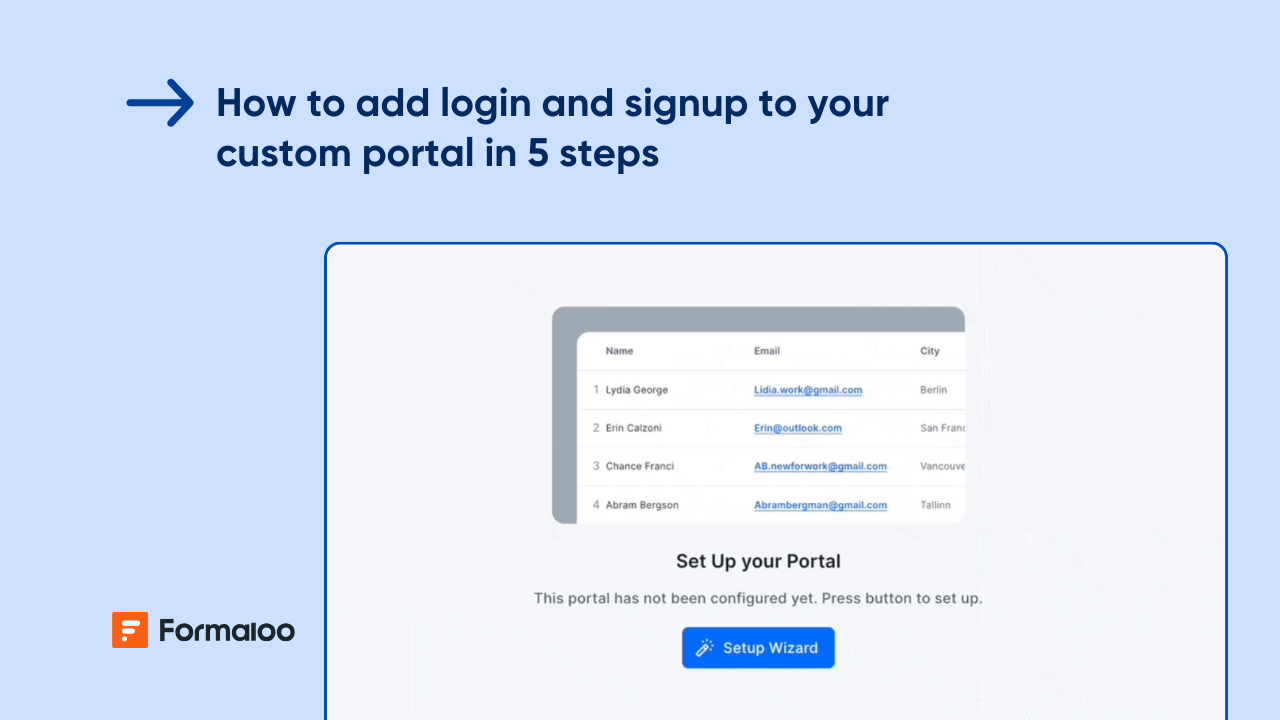
Creating a custom portal for your business or organization can greatly improve user experience by offering secure, personalized access to your app. Whether you're building a client portal for managing customer interactions or creating a membership portal for your community, one essential feature is adding login and signup functionalities.
At Formaloo, we make it easy to turn your no-code app into a fully functional portal with user-specific access levels, role management, and secure sign-in options. In this blog, we’ll walk you through how to add these features to your app in just five simple steps.
What is a custom portal, and why do you need one?
A custom portal is a secure online space where users can log in to access personalized content, interact with services, or manage their data. Examples of portals include client portals, membership portals, and customer portals. These portals allow businesses to streamline interactions, improve communication, and offer tailored services based on user roles and permissions.
With no-code tools like Formaloo, building a portal has never been easier. You don’t need any coding knowledge to create one. By enabling login and signup functionalities, you’re not just giving users access but also controlling what they can see and do within your app. This feature is essential for businesses looking to offer exclusive access, track user interactions, and manage permissions.
5 Steps to add login and signup to your no-code custom portal
Now that you understand the importance of adding login and signup to your portal, let’s look at how you can set this up in Formaloo.
Step 1: Prepare your app
To get started, open your Formaloo workspace and select the app where you want to enable login and signup features. If you don’t have an app yet, you can start by creating one using our no-code templates or importing your data from tools like Excel.
Step 2: Enable edit mode and public view
Once inside your app, toggle Edit mode from the upper-right corner to make changes.
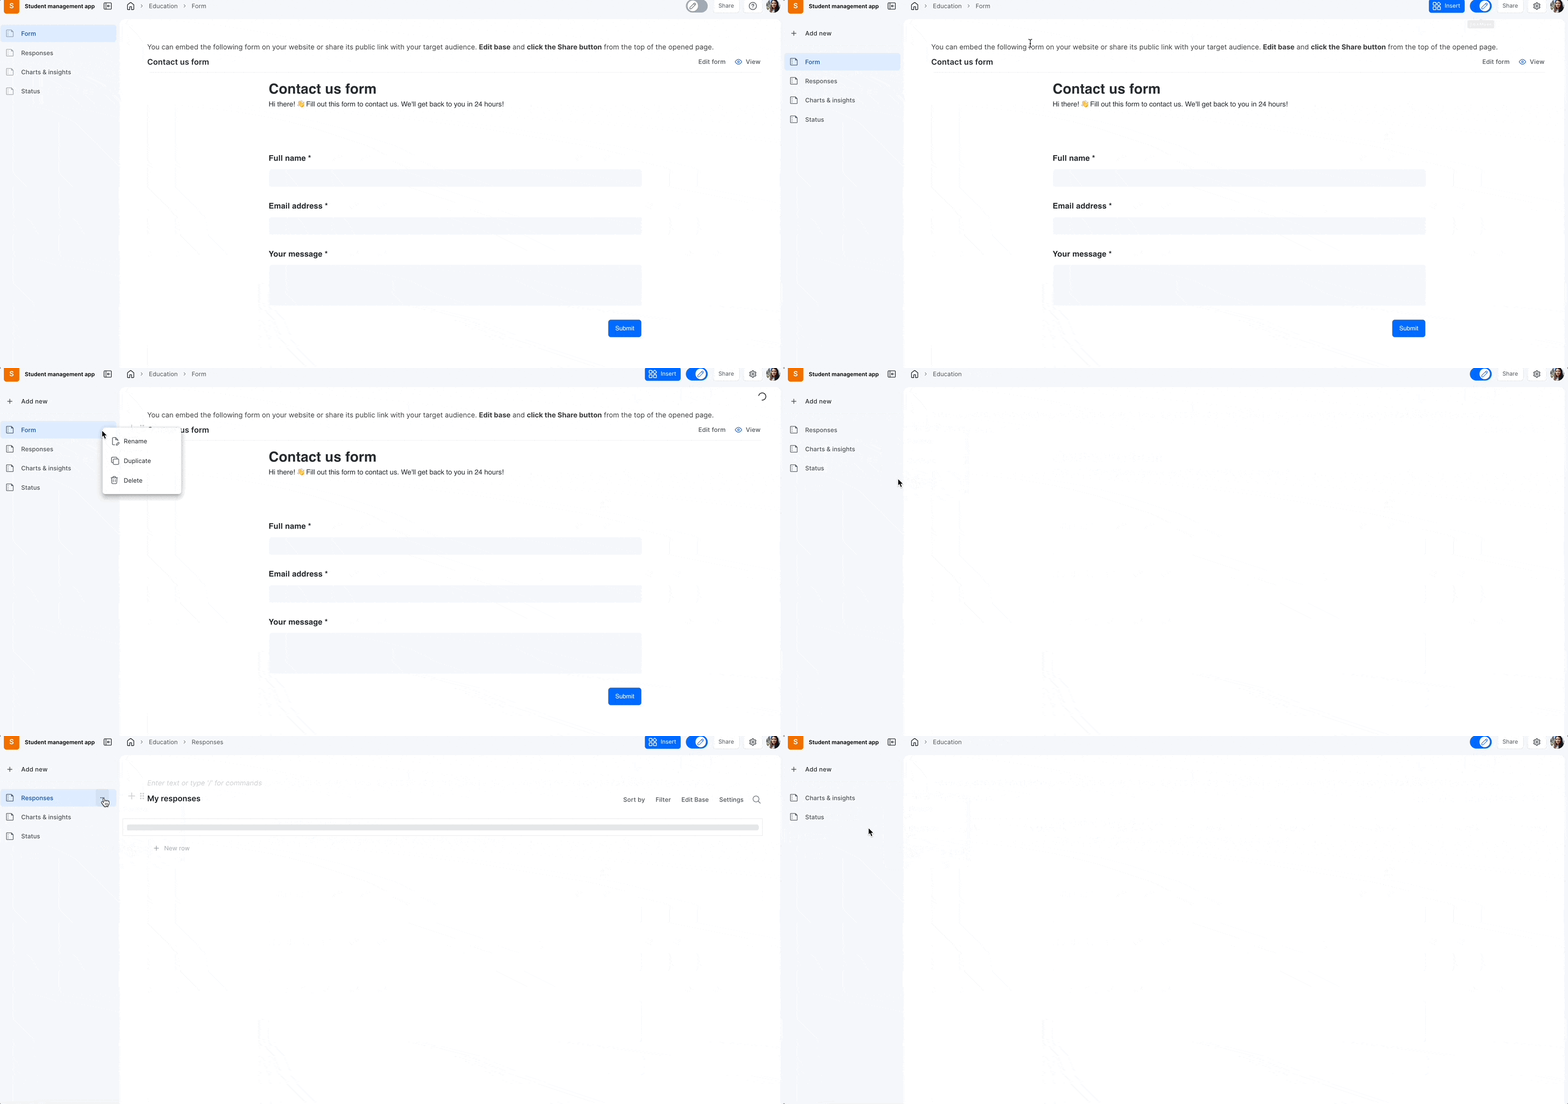
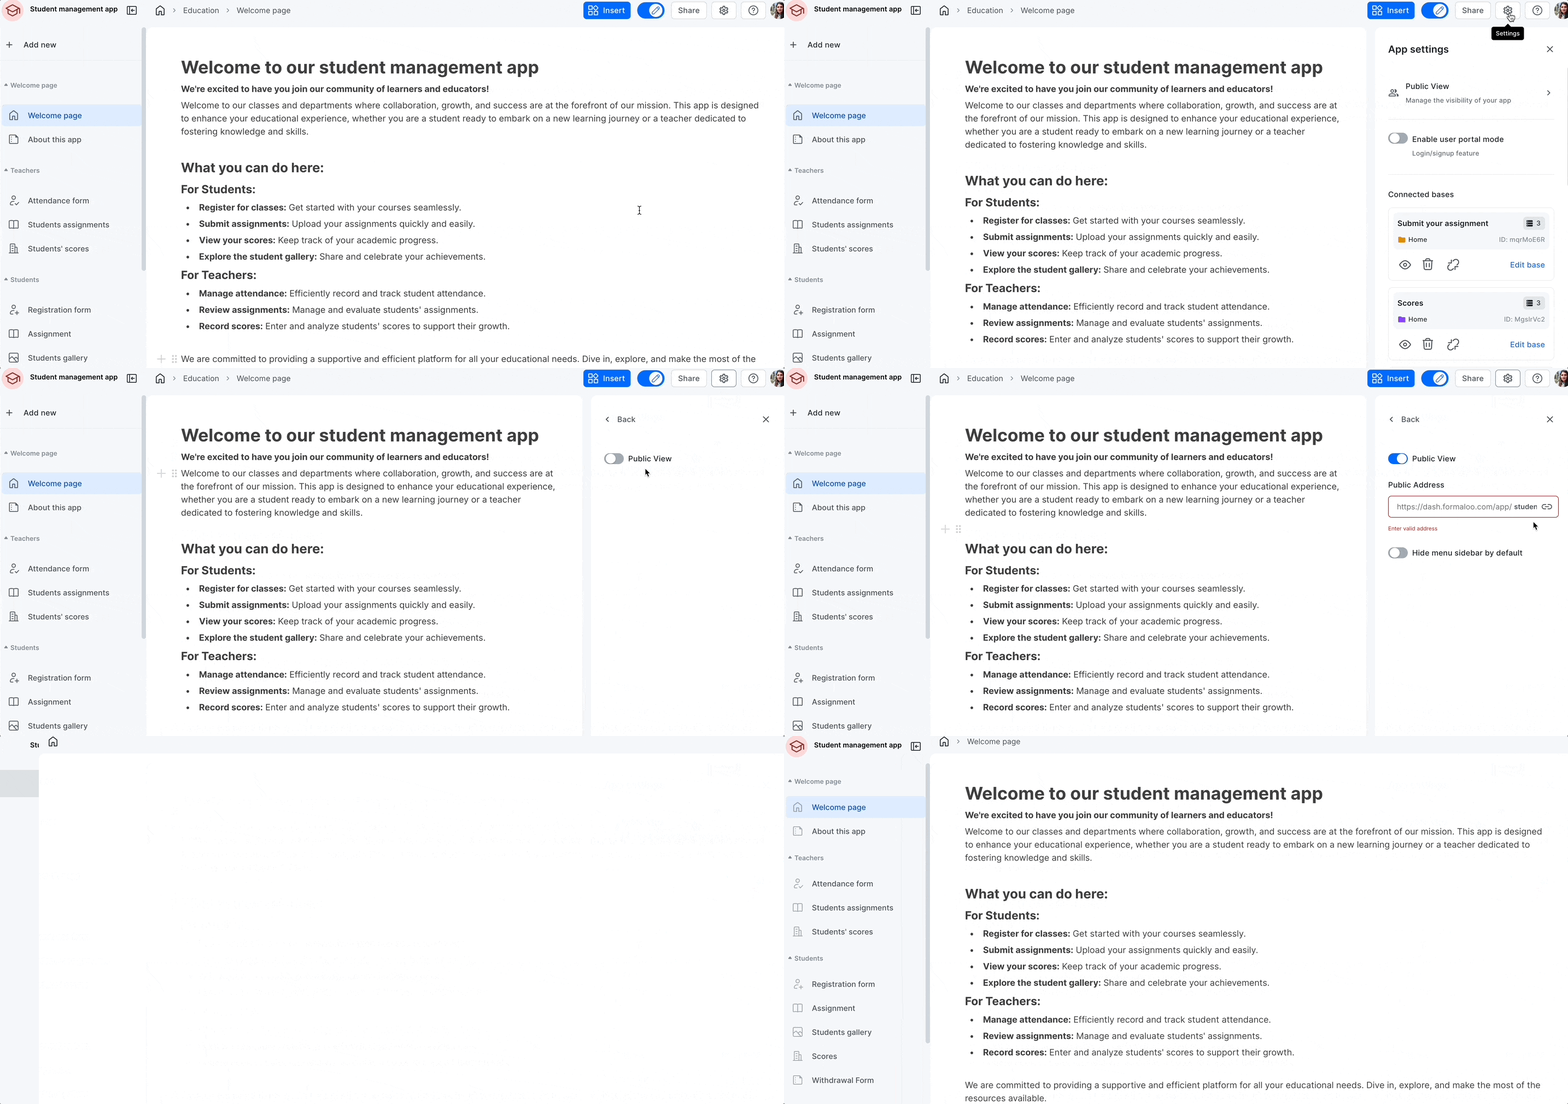
Since this app will function as a portal, ensure the Public view is enabled. This will allow users to access the portal via a public link. Navigate to the settings and enable public view from the options menu.
Step 3: Activate user portal mode
Next, go to the Settings tab on the right side of the screen and enable User portal mode. This action will activate a User portal button at the top of your app's page, which is crucial for managing user sign-ins.
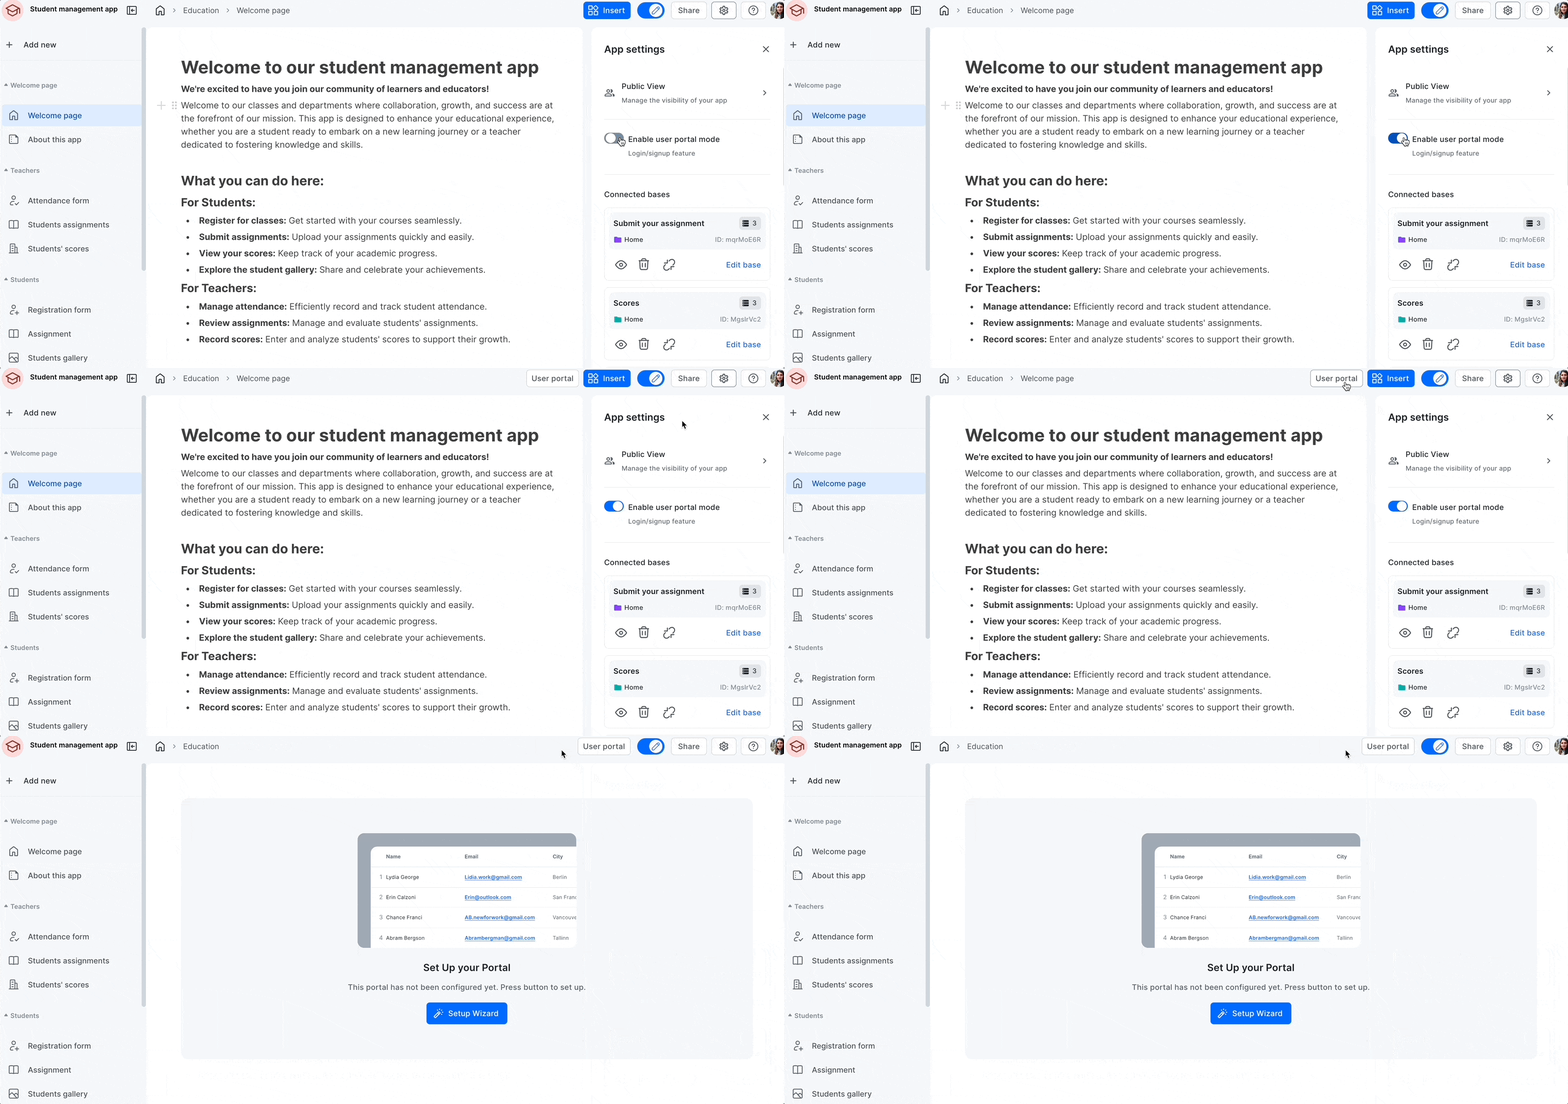
Step 4: Set up the user portal
Once the user portal mode is activated, click the User portal button to open the 3-step configuration wizard. This wizard helps you set up the user base and customize portal settings.
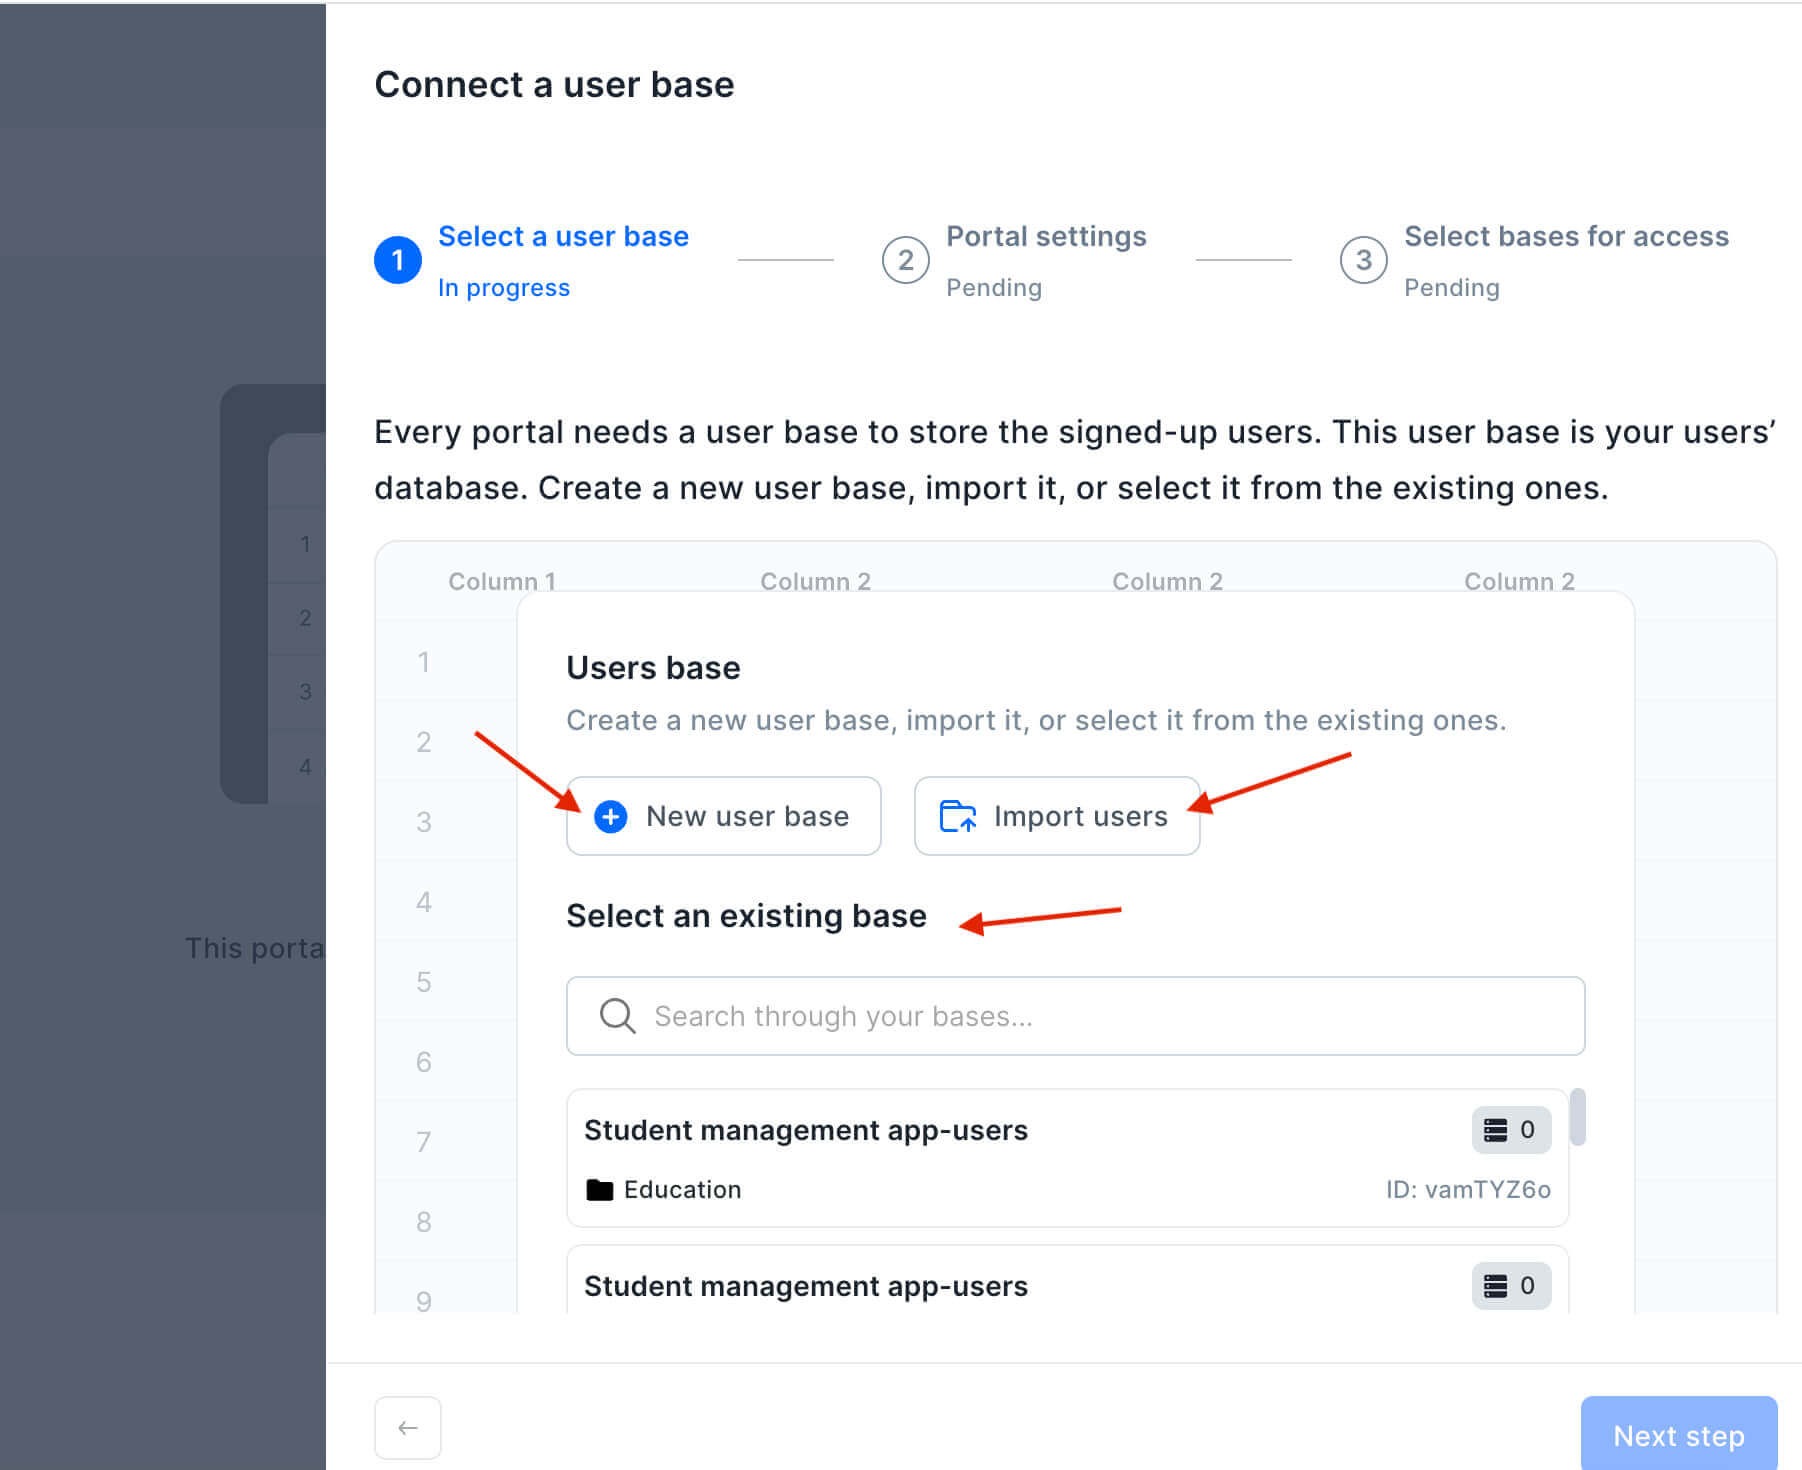
1- Add a user base
You have three options for adding a user base:
- Create a new user base: Automatically add users who log in or sign up.
- Import existing users: Import users from an external source like Excel.
- Select an existing base: Use a user base that’s already in your Formaloo account.
2- Portal settings
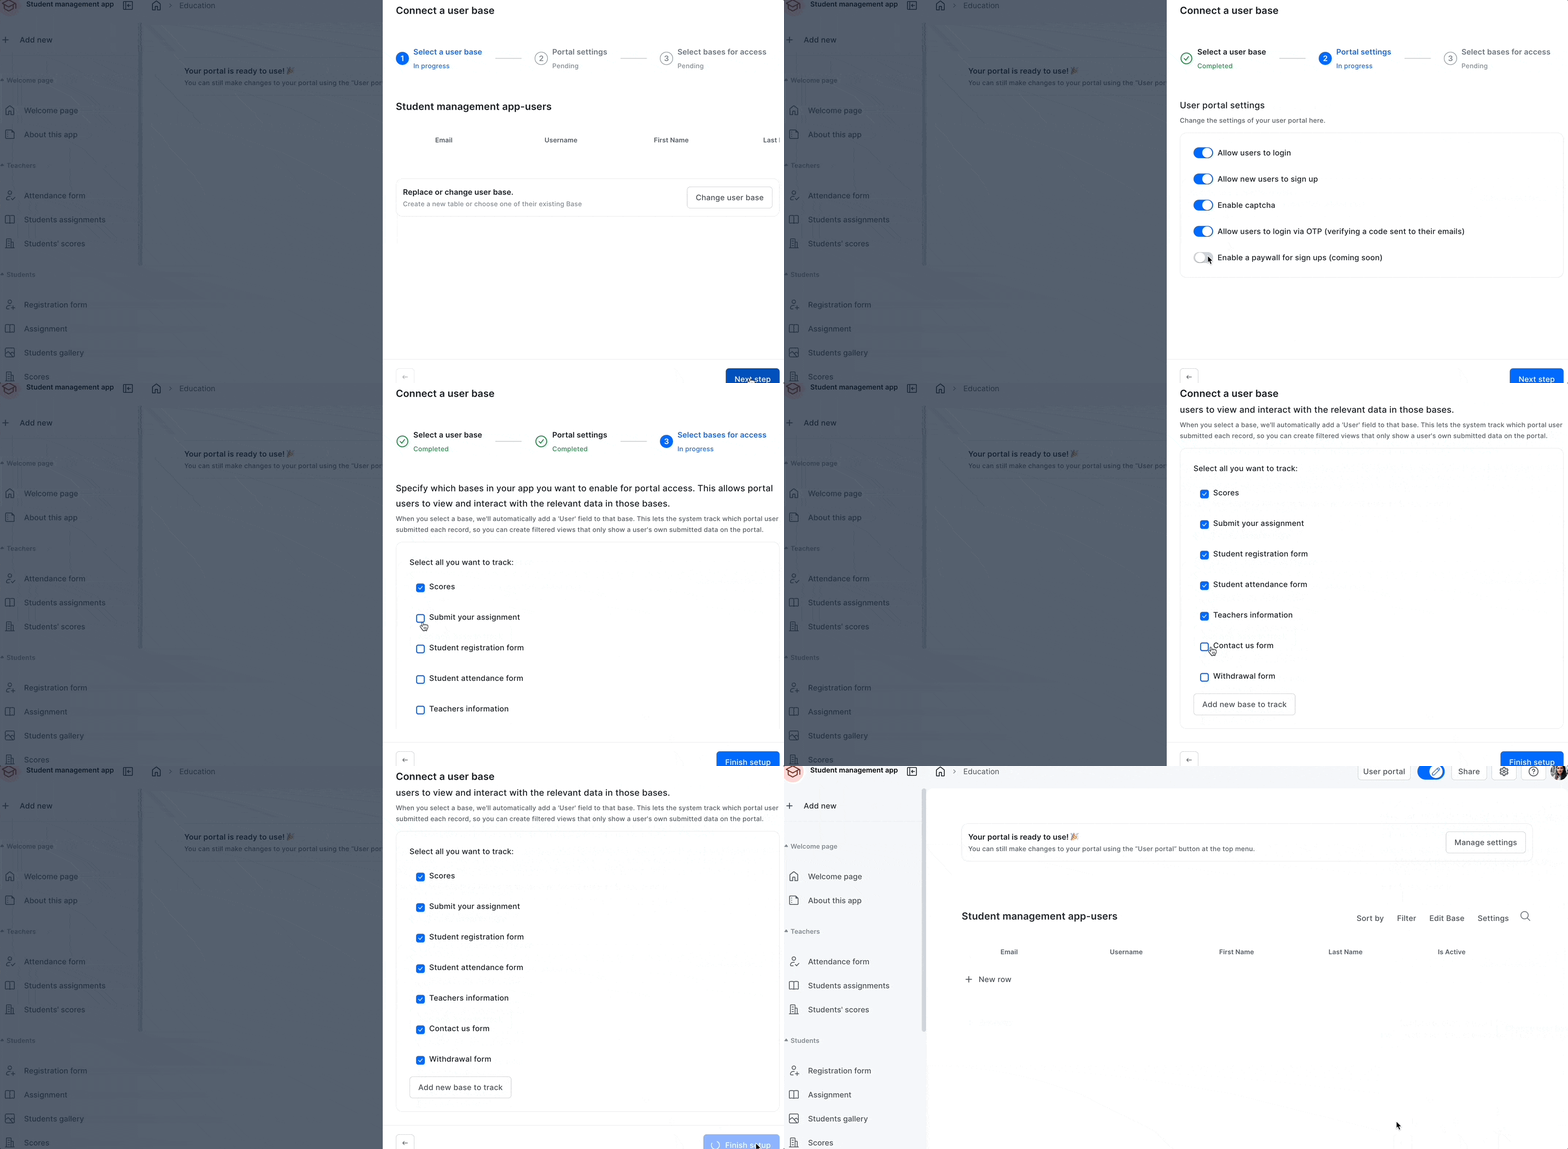
In this step, configure how users can interact with the portal:
- Allow users to log in: Enabled by default.
- Allow new users to sign up: Enabled by default.
- Enable CAPTCHA: Optional, for extra security.
- Allow users to log in with OTP: Enabled by default for secure login via one-time password.
3- Select bases for access and tracking
Here, you’ll choose which data (forms and bases) users can access and track when they log in. You can fine-tune these access permissions later.
After setting this up, click Finish Setup.
Step 5: Manage user roles and restrict page access
Managing who can access what in your portal is simple. Formaloo allows you to create custom roles and assign permissions. To manage this, edit the Users table in your app, add new roles, and decide what each role can access.
To restrict access to specific pages, open your Formaloo dashboard, select the page you want to restrict, and change its visibility options. You can restrict pages to:
- Public: Visible to everyone.
- Non-logged-in users: Only accessible to users who haven’t logged in.
- Logged-in users: Only accessible to signed-in users.
- Specific user roles: Visible to selected roles only.
- Team members: Only accessible to your workspace team.
- Specific team access levels: Restricted to workspace members with certain roles.
With these settings, you can control who sees what and ensure that sensitive information is only accessible to authorized users.
How to manage sign-up and login settings
You can always revisit and modify your sign-up settings by clicking the User portal button in your app’s top toolbar. This will take you to the User Management page, where you can adjust sign-up permissions, modify access levels, and add new users. You can also reconfigure the portal by clicking the Setup Wizard button.

Transform your no-code app into a powerful portal
Adding login and signup functionality to your no-code app is essential for creating a custom portal that delivers secure, role-based access to your users. By following these simple steps, you can ensure that your portal not only meets the needs of your audience but also offers an intuitive, streamlined experience for managing users and data.
Want to learn more about how custom portals can transform your business? Check out our other posts:
With Formaloo’s no-code platform, you’re just a few clicks away from building a portal that enhances user interactions, secures sensitive data, and simplifies your workflow.

.png)
.png)


