How to create approval forms
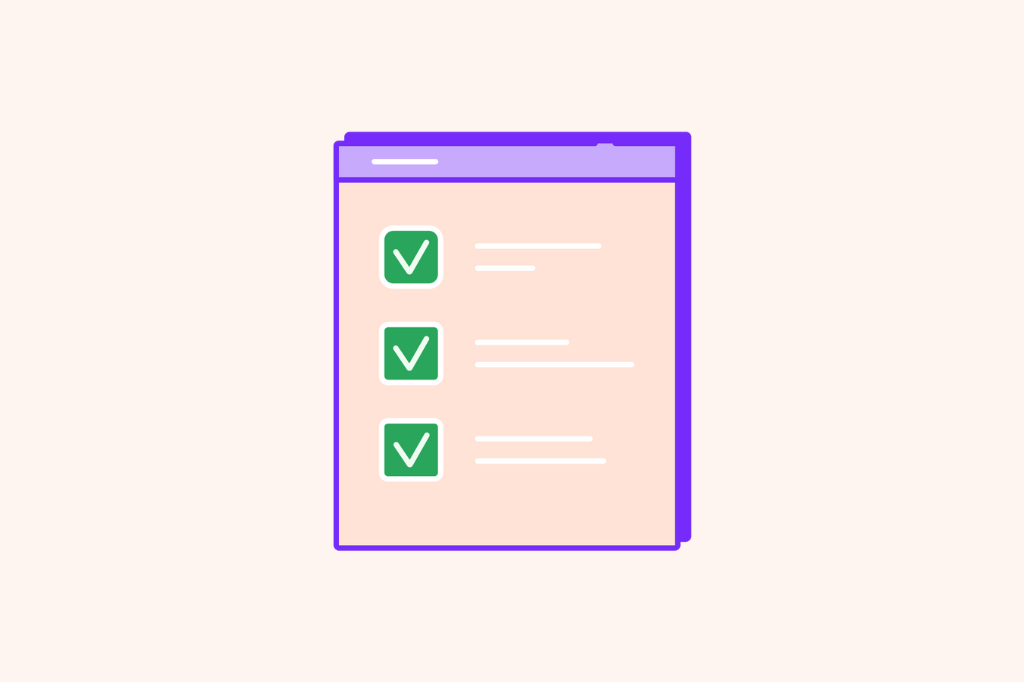
Approval forms are used to get official consent or permission for a specific action, decision, or request. In this tutorial, you will see how to build approval forms in 4 easy steps.
.png)
You can find approval forms in various contexts, including business, education, government, and organizational settings.
Approval forms help you to guarantee that you have received the required confirmation from all necessary parties or authorities. These forms often provide fields for recording crucial data, like the requester’s identity, the request’s goal, the specifics of the action or decision being requested, and the approver’s signature or electronic confirmation.
Examples of approval forms
Approval forms can vary considerably depending on the context and purpose for which they are utilized.
Here are a few examples for approval forms:
- Expense reimbursement forms
- Project approval forms
- Purchase requisition approval
- Leave request approval
- Travel authorization approval
- Training request approval
- Change request approval
In this article, we are going through making an “Expense Reimbursement” form. Then, You can see how to make an app, manage your approval status, and track your business processes.
If you want different managers or departments to review and approve your form separately, you can build a separate dashboard for each manager and share the link with them.
A step-by-step guide to creating an efficient approval form
Making your form is the first step to automating your expense approval process. You can make it from scratch or use one of our 200+ templates and customize it.
Let’s start making the expense reimbursement approval form.
If you don’t have a Formaloo account yet, signup here now and follow these steps:
Step 1- Create your form
Open your dashboard and click on + new formaloo to create a new project. You can name the project and then change it by double-clicking on it whenever you need to. You can also add the image by clicking on the icon displayed next to it.
You’re now redirected to the dashboard with a ready-made form to start with and results menus. To customize the form, click on edit base. This will take you to an editor where you add the desired fields to your form.
Start by customizing the look of your form. For example, change the background color, add your logo, insert images if you want, change the font and size, etc.
From the design tab, you can change the display of questions - make them all shown on a single page (classic form) or on separate pages (one question at a time).
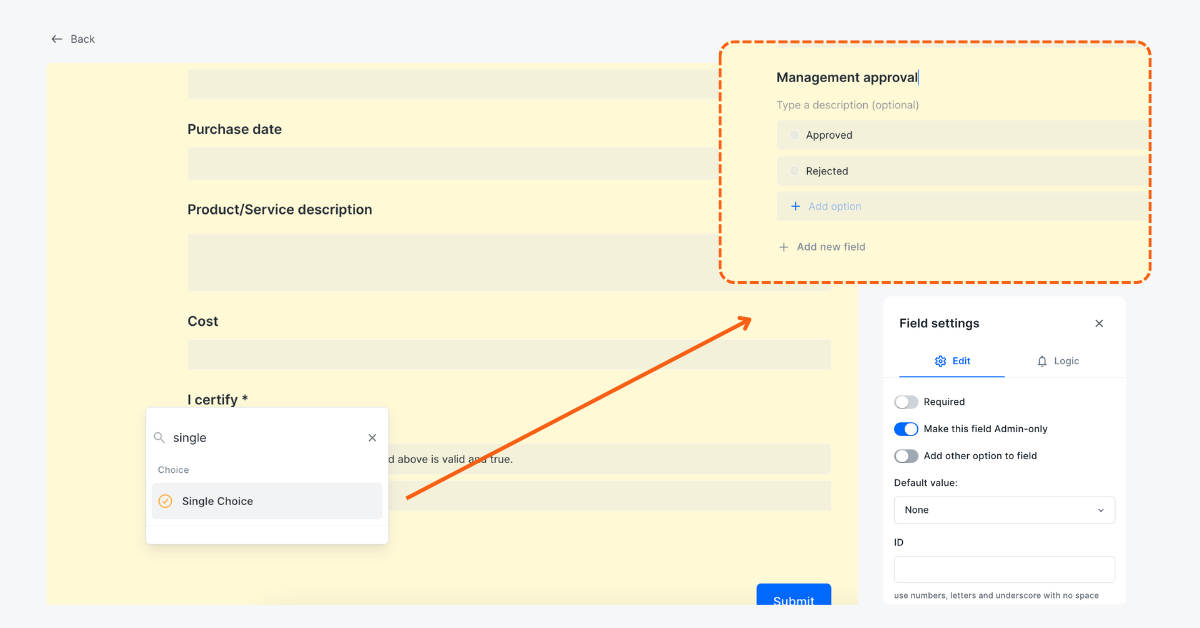
Step 2- Add an approval status field
In the approval forms, the submitted requests can be routed to your finance manager or another member of top management before it is officially approved.
To track the status of the request, add a status field to your form. Here’s how you can do it:
Each submitted request can have only one status. So add a “Single-choice” field and add two options on it: one for “Approved” and one for “Rejected“.
Then, make the field “Admin-only“, to prevent showing it on the form to the users who are filling the request form.
In the next step, you can see how to use this field in your approval workflow process and manage the status of your responses on this template.
Step 3- Organize approval status in a Kanban
Now, let’s build your dashboard to manage your approval workflow.
The structure of your app
Go back to your dashboard. On the left, you can see your dashboard’s menu and all the pages inside it. You can add new pages to your menu or remove the existing ones.
By default, all dashboards have a page to show the results of the form in a table view and also another page to show the charts for that data.
Add a page to show the approval pipeline
For inserting Kanban, you can either (1) check the status page on the dashboard, which is pre-made for the template or (2) add a new page by clicking on +add new and choosing page and insert the Kanban board by clicking on + insert or typing the “/” and choosing Kanban from the menu. By double-clicking on the page name, you can change it and also adjust the icon of the page by clicking on the default icon.
For our approval workflow, we need 2 main pages on our menu:
- All requests: to show the result of the submitted forms.
- Final approval status: to categorize the status of the forms by the manager in a kanban board.
You can select to group your Kanban by any single choice or dropdown field. In this example, you can select to group it by the management status field you created in the previous step. It will categorize your data into two columns: approved and rejected. These are the two options for our admin-only field that we created in Step 2.

When you open the Kanban page, you’ll see another row named as uncategorized. This is a column that Formaloo automatically uses for uncategorized cards and is the default for cards’ categorization.
By clicking on customize cards, you can decide what is shown on the cards. Select which field should show as the title of cards in your Kanban board.
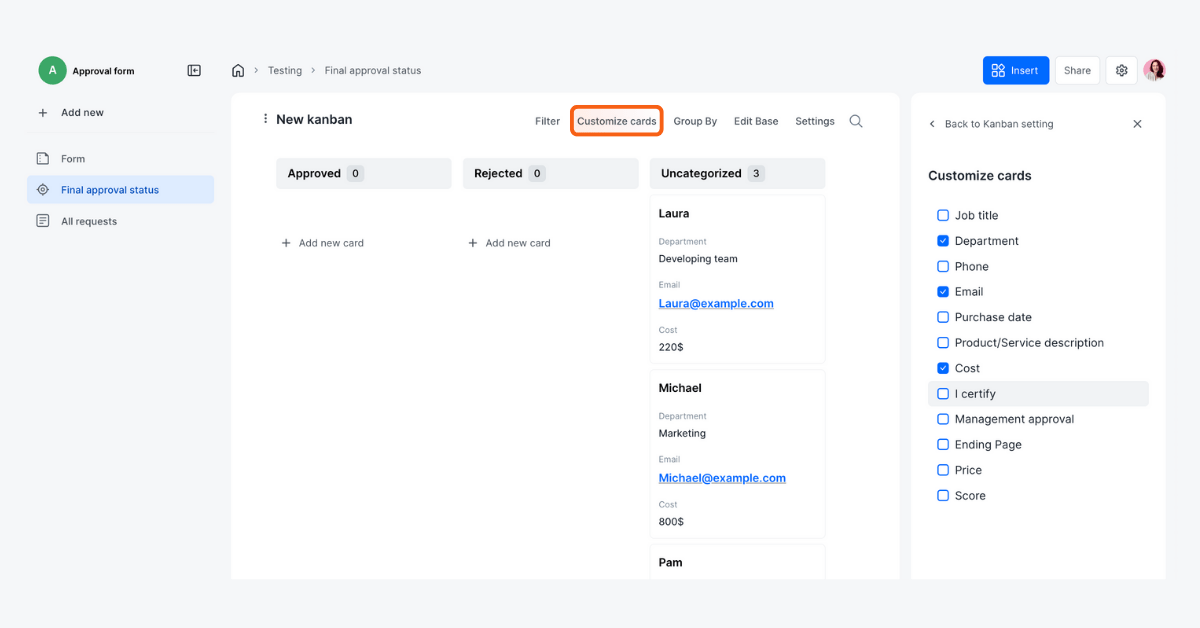
You can drag the card and drop it into the approved column, to approve it. Or drop it into the rejected column to reject the request.
Step 4- Create a custom email template for approvals
The final step is to send an email to the manager whenever a request form is submitted. This way, the managers will get notified about the request and can review it in the app and approve or reject it.
You have 2 options to create a new email template. You can either create one from the dashboard or while editing the form.
- To create it from the dashboard, go to integrations from your profile icon. Choose email from the apps. From here, you can click on + add new template and it will open a window from where you can customize your email template. Make sure to add a template name as it is how it will be saved and if needed later chosen for different forms.
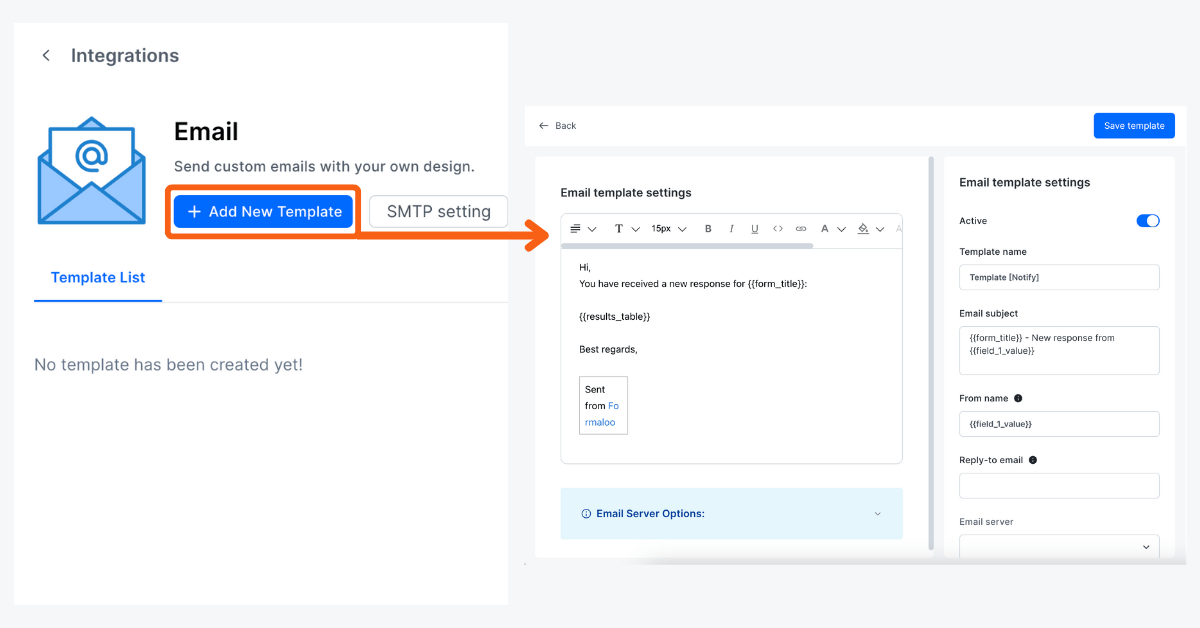
- To access email template customization, click on the notify tab. You can add a template from an admin email template. From here, click on + add new templates.
Custom notification emails let you personalize the email’s text and even customize the SMTP settings to send the emails from your email address.
Add the URL of your dashboard inside the email content box to allow the manager to directly review the requested submission in your approval dashboard.
Don’t forget to set this email template on your approval form. To do so, edit your form, go to the notify tab, and enable the receive email notifications option. Then, you can insert your email address and also the email address of the manager(s) who should receive a copy of the submitted data. Finally, select the email template to be used in your notification email.
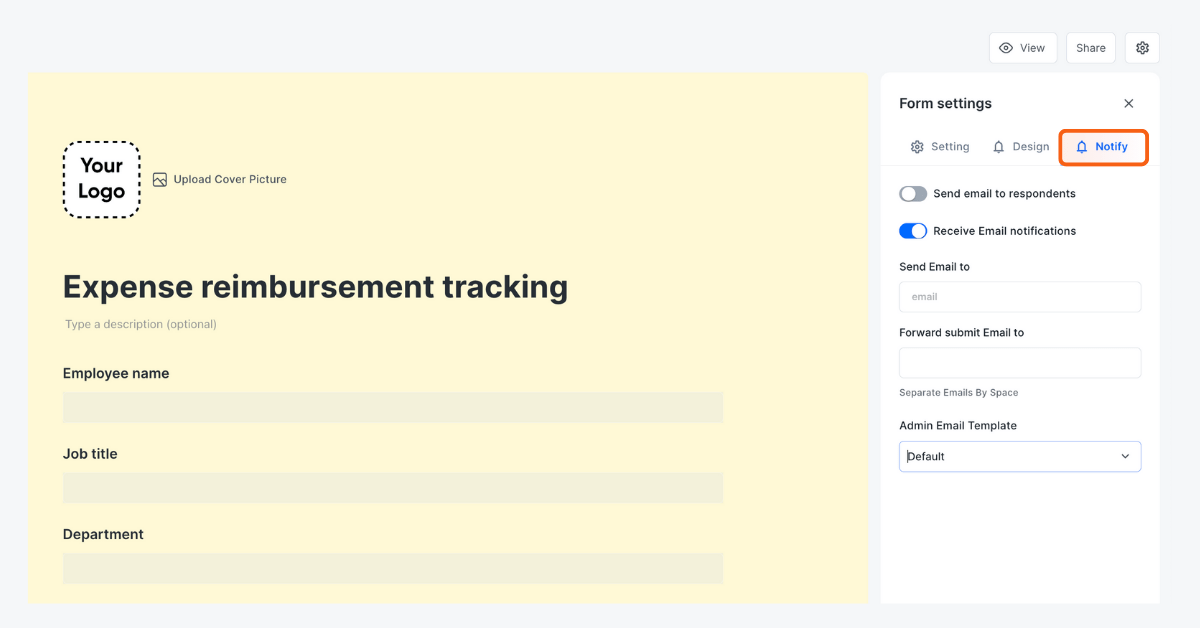
You can choose to send a notification email to the submitter as well. For this purpose, you must have an email field on your form to collect the requester’s email address. Then, enable the send email to respondents option. And finally, select the email template to use for this email notification.
So when a form is submitted, this email will be sent to the managers and they can see the results and complete the approval process.
Learn more about how to use the email templates in forms.
Congrats! You have created a customized approval form in just a few clicks! With this approval dashboard, you can automate your manual processes. It helps you boost your team’s collaboration and save time.
Conclusion
Approval forms are great tools for businesses looking to improve workflow automation and communication. You can streamline your approval procedures, increase transparency, and speed up decision-making by using these forms on your website.
In this article, we went through a step-by-step guide to creating an approval form and workflow. You can customize it based on your needs and personalize it for your own use.
Start creating your form from scratch or select from 200+ ready-to-customize templates.
Sign up at Formaloo for free now and start exploring the amazing features it offers. These range from simple contact forms to complex and logical quizzes and surveys.
Follow us on our YouTube channel to get tutorials and live product demos.
If you have any questions, check out Formaloo’s support page to find ways you can contact us.